How to Change Crochet Yarn Colors: Easy Step-by-Step
A crochet granny square feels heavy and cozy in your hands, offering a tactile comfort that makes it a favorite for blankets or decorative pillows. This project suits beginners who want to build confidence with hook tension while practicing clean joins. You will learn the specific, invisible technique for switching yarn colors to ensure your square edges remain neat and professional without awkward knots or bumpy transitions. This method removes the frustration of tangled ends, leaving you with a tidy fabric that looks finished on both sides. Mastering these seamless transitions allows you to play with your entire yarn stash efficiently.
Why This Project Is Worth Making
The Classic Crochet Granny Square is the quintessential building block of the crochet world. It relies on a simple, repetitive rhythm that makes it ideal for working on while listening to an audiobook or traveling. Because it starts from a small center and grows outward, you can easily stop at any size to create everything from a single drink coaster to an expansive bedspread. The construction uses basic double crochet clusters, which ensures a soft, squishy fabric that drapes beautifully when joined together.
Working on these squares is an efficient way to clear out your stash. Since each round can be a different color, you can utilize small leftover yarn balls that are otherwise too short for larger garments. The pattern is inherently forgiving, meaning that if you make a mistake, you can easily unravel one round without losing the progress of the entire piece.
I have made dozens of these squares for a memory blanket. The pattern is simple enough to memorize after just two rounds, but the color combinations keep it interesting.
— Sarah, hobbyist crafter
Pattern Overview & Skill Level
- Skill Level: Beginner
- Approximate Time: 30 to 45 minutes per square
- Construction: Worked in joined rounds, starting from the center and expanding outward with corner clusters
- Finished Dimensions: Approximately 6 inches by 6 inches when using worsted weight yarn
Materials & Supplies Needed
- Yarn: Worsted #4 weight, 100% acrylic or wool blend, approximately 30 yards per square.
- Hook Size: 5.0 mm / H-8
- Notions: Tapestry needle for weaving ends, sharp scissors.
- Safe Yarn Substitutions: You can use DK weight (#3) yarn with a 4.0 mm hook for a smaller square or bulky weight (#5) yarn with a 6.0 mm hook for a larger square. Note that changing the weight will significantly alter the final dimensions and drape.
Stitch Guide & Abbreviations (US Terms)
- ch: chain
- sl st: slip stitch
- dc: double crochet
- st/sts: stitch/stitches
- sp: space
- cluster: a group of 3 dc worked into the same space
- shell: 3 dc, ch 2, 3 dc worked into the same corner space
Step-by-Step Pattern Instructions
This square is worked in the round. You will join each round with a slip stitch to the top of the first stitch or the starting chain.
- Rnd 1: Start with a magic ring. Ch 3 (counts as first dc), work 2 dc into the ring. Ch 2, 3 dc, ch 2 3 times. Join with a sl st to the top of the initial ch 3. (12 dc, 4 ch-2 spaces)
- Rnd 2: Sl st into the next two sts and into the first ch-2 corner sp. Ch 3, 2 dc, ch 2, 3 dc in same corner sp. Ch 1, skip 3 sts, (3 dc, ch 2, 3 dc) in next ch-2 corner sp. Repeat from * to * two more times. Ch 1, join to the top of the starting ch 3. (24 dc, 4 ch-2 spaces, 4 ch-1 spaces)
- Rnd 3: Sl st into the next 2 sts and into the ch-2 corner sp. Ch 3, 2 dc, ch 2, 3 dc in same corner sp. Ch 1, 3 dc in ch-1 side sp, ch 1, (3 dc, ch 2, 3 dc) in next ch-2 corner sp. Repeat from * to * two more times. Ch 1, 3 dc in final ch-1 side sp, ch 1, join to top of starting ch 3. (36 dc, 4 ch-2 spaces, 8 ch-1 spaces)
- Rnd 4: Sl st into the next 2 sts and into the ch-2 corner sp. Ch 3, 2 dc, ch 2, 3 dc in same corner sp. (Ch 1, 3 dc in next ch-1 sp) twice, ch 1, (3 dc, ch 2, 3 dc) in corner sp. Repeat from * to * two more times. Ch 1, 3 dc in next 2 ch-1 spaces, ch 1, join to top of starting ch 3. (48 dc, 4 ch-2 spaces, 12 ch-1 spaces)
Care & Washing Instructions
- Machine wash your finished piece on a gentle cycle in cool water using mild detergent.
- Lay the square flat on a clean towel to air dry, ensuring you reshape the corners to maintain a square geometry.
- Block the square by pinning it to a foam mat and lightly steaming if you used acrylic yarn, or spray blocking if you used wool.
Pro Tips & Common Mistakes to Avoid
Always maintain consistent tension, especially during the chain stitches between clusters, as these dictate the flatness of your square. If your square is curling into a bowl shape, your chains are likely too tight. Use a stitch marker in the first stitch of every round to easily identify where to join your slip stitch at the end. When weaving in your ends, run the needle through the base of the stitches on the back side of the work for at least one inch to ensure the yarn does not pull out over time. If you want to make the square larger, simply repeat the pattern of working 3 dc into every ch-1 space along the sides, and the standard shell (3 dc, ch 2, 3 dc) in every corner, for as many rounds as desired.
Frequently Asked Questions
Can I use cotton yarn instead of acrylic?
Yes, cotton yarn works well for granny squares, though it has less stretch than acrylic. Expect a firmer, slightly heavier finished square that holds its shape very well.
Is it okay to change colors every round?
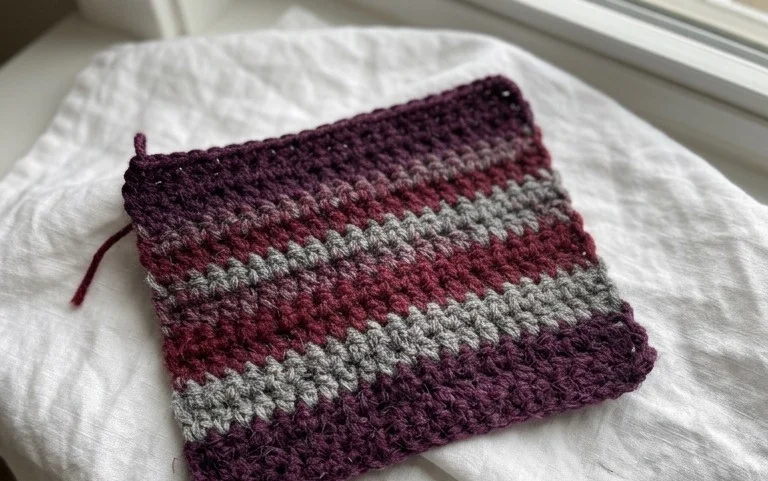
Changing colors is common and encouraged. To do this, fasten off your yarn at the end of a round and join the new color in any corner space with a slip stitch before starting your next round.
Why is my square not laying flat?
If the square ripples, you have too many stitches or your tension is too loose. If it pulls tight and creates a cup shape, your tension is too tight or you are missing chains between the clusters.
Can I sell items made from this pattern?
You are welcome to sell finished items made from this design as long as you use your own photographs and credit the pattern source. Do not sell or redistribute the written instructions themselves.
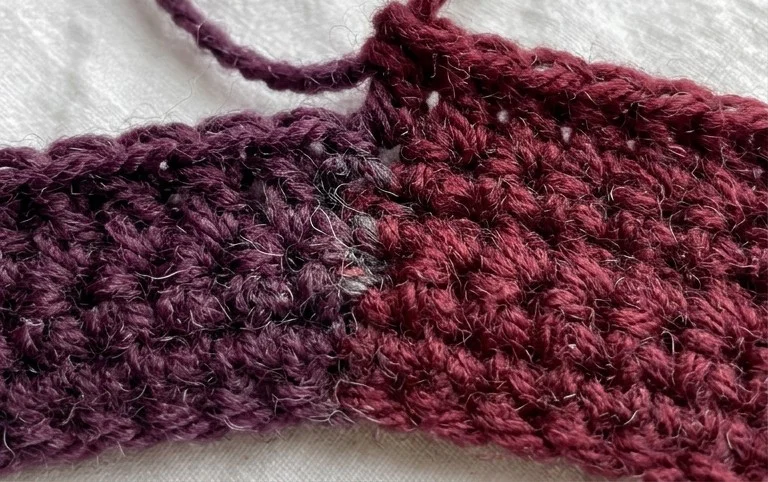
Your finished square looks polished with its clean, sharp color transitions and smooth edges. You can experiment with using a variegated yarn for the final round to add a subtle pop of texture against your solid centers. Sharing your progress on social media helps others see how different color palettes change the entire look of this simple design. You can find more free patterns and techniques for your next project on our blog archive whenever you are ready to pick up your hook again.